Thursday, April 16, 2015

Extra for my swap partner - quilted thread catcher

I made this for my Rainbow Mini Swap partner a few weeks ago.  These little cubes are super easy to put together and very useful as a thread catcher or handy for holding just about anything.  I start with two squares of fabric approximately 12.5" square and sew right sides together along three sides.   Turn right side out and press.   Insert a piece of stiff interfacing (I used Pel-Tex) that is just slightly smaller than the finished dimensions of your fabric square.  Fold in the unfinished edges and press. Top stitch all the way around close to edge and make sure you catch the previously un-sewn edge.


Then quilt as desired.  I used Leah Day Concentric Circles.  The thread is Aurifil 28 weight and really looks fabulous!  I am using m y Juki TL2010Q for FMQ.


After quilting fold the square in half and sew a seam starting about 3" up from the fold across to the bottom fold creating a triangle.  Do this on the right and left sides and then re-fold the square in the opposite direction to make the seams on the other two sides.  This will be done with your square folded so that the fabric that will end up on the outside is to the inside of the fold.


The final step is to fold down the flaps and add a button if you choose.  I used vintage MOP (mother of pearl) buttons I scored on e-bay a few months ago.


And there you have it!  I bet the instructions for sewing the corners are a bit confusing without pictures so I will try to take some next I make one of these.


Wednesday, April 15, 2015

UFO turns into a birthday gift

Every year our quilt guild (Rochester Modern Quilt Guild) hosts a UFO challenge with members committed to completing certain projects by certain due dates.  I had the blocks for this quilt made many months ago (OK more than one year ago and maybe even longer...sheesh!!)  All it needed was setting triangles for the sides and corners.   I don't know why I was intimidated by this step because it turned out to be pretty easy.  I really like how the sashing and small corners stones make this look somewhat like a plaid or argyle pattern.

Odds and Ends all finished

Back view (I hate how crooked the piecing is at the bottom - ewww!)


The light is just right to showcase the quilting


I tried some of Angela Walters Dot-to-Dot quilting technique in some of the squares and free form flowers in others.  The sashing was left unquilted and should puff out nicely once the quilt is washed.  Green Minkee Dot is on the back making this a somewhat heavy and super snuggley quilt.

So...a UFO finished and a birthday gift given!

Tuesday, April 14, 2015

Modern Round Robin - the Sea Quilt

After a little blip where a few quilt tops went missing for several weeks, I finally received this beautiful top in progress.  I love the mix of blues and greens with the crisp white background.  It has the feel of the sea.  The medallion style quilt started with the center diamond and geese surrounding.  The next round added the clover shapes and more geese.  And finally just before heading to me the white and pieced borders.  Hmmmm.....what shall I add?
Before

I felt like the top needed some curves so I pulled out my  
Quick Curve Ruler from Sew Kind of Wonderful and went to work.  The side and top borders have an improv feel with the curves not quite lining up with each other which I thinks looks fabulously modern.  As a final touch I reverse appliqued some circles for the corners.  I scootched (is that a word?) them in to be close with the curves.

After
I am so pleased with the result and I sure hope the owner of the top loves it too.  I can't wait to see what is added for the final round.

Monday, April 13, 2015

It's all about the swaps!

For those that follow me on Instagram (swink_girl) you know I have signed up for a ridiculous number of swaps lately.  I do not know what possessed me.    The #rainbowminiquilt swap has just wrapped up so one down out of five! (I know...ridiculous).  I made this very sweet improv geese mini.

Completed Happiness Is miniquilt


I really love how it turned out.  The background is a shot cotton.  This is the first time I have worked with shot cotton and it is deliciously soft!  It made the perfect backdrop for paper pieced geese.  The quilting was done on my #jukitl2010q which handled the Superior Magnifico thread wonderfully. The thread has a nice sheen to it and really makes the quilting shine.    I have been brushing up on my #FMQ by watching videos by Leah Day.  She sure does make it look easy.    The text quilting in the middle was inspired by one of her videos  Thread Painting Words on your quilt.
Here are some more shots of the mini in progress.


Before Quilting

One row of geese inserted

Paper piecing the geese

The pattern hand drawn on freezer paper


One down and four more to go!


Monday, February 16, 2015

Tote and Chromebook Sleeve


With Quilt Con only a few days away, I have been busy with preparations such as making a sleeve for my HP Chromebook and a new backpack tote.  I splurged and used some of my most favorite fabrics.  Don't you just love those little mice from @lizziehouse?  The sleeve is very simply constructed with minimal straight line quilting along the seams.  I lined it with flannel left over from another project.  It was l looking a little bland until I added a swath of vintage buttons.  I like that they sort of blend in color wise but add an interesting texture and detail.  The top button will be for closing the sleeve once I add a loop.


This is before I added the buttons.

The sleeve coordinates perfectly with this backpack tote.   I figure I will need to have a bag for carrying around my notebook and class supplies ans this little back will be perfect.  Although I did not use the pattern, this bag is very similar to Joan Hawley's Chelsea Backpack Tote (Lazy Girl Designs).  I watched her YouTube tutorial for assembly and with a rough idea of the dimensions I just dove in and made it!  I modified it a bit and placed a welt pocket on the front instead of a patch pocket.    The fabrics are Dear Stella and Lizzie House  - divine!


Front View

Back View  - with the ingenious zippered strap that coverts the tote from a shoulder bag to a backpack.

Inside view with pockets for organizing.
If I made this again I think I would use something more sturdy to hold the shape of the bag instead of the batting called for in the pattern - like Peltex for example.  It was fun to make and I can't wait to load it up for Quilt Con!


Saturday, February 14, 2015

Won't you be mine?

Just in time for Valentine's Day!
Quilting on the Innova

I love churn dashies!

All finished

Quilting close-up

Even closer

Made with Moda Kiss Kiss charm packs and backed in super soft white Minkee Dot, this is the perfect Valentine's gift.

Wednesday, February 11, 2015

Longarm Tool Caddy

Having a husband who is a very skilled woodworker has its perks!  I asked for a box/holder for my acrylic templates and rulers in order to have them handy when quilting and this is what he came up with.
This side holds marking tools, oil bottle, thread, etc.  There is also a long slot across the front that holds needles.

This side has multiple slots for the templates and rulers.


It fits just perfectly on top of my rolling tool chest and therefore I can have it right beside me as I work.  Thank you Mr. Swink!

Tuesday, February 10, 2015

Christmas!

As is always the case in December, there was a mad rush to finish up a few handmade goodies.  This definitely moved blogging to the back burner and the Swink Girls are just now getting back into the swing of things post holidays.  Apologies for the very quiet blog over the last several weeks!

This was a super secret project for Francesca; a peacock mini quilt.


This picture was taken at night so not the best but you get the idea.  The bird is made up of layered applique.  I used invisible thread to secure the edges.   I had the opportunity to use my Juki for the FMQ and I have to say, I just love that machine!  The mini has a faced backing which is a technique I learned at our guild (Rochester Modern) and which I definitely will use again.


I was in the mood several months ago for some wool applique so I started this project with a new neighbor in mind.  After finishing the blanket stitching I added some other decorative items and some vintage buttons (another little addiction of mine!).


This was also quilted on the Juki and shows my first feathers on this machine.  I was very pleased with how it turned out and the neighbor liked it too!

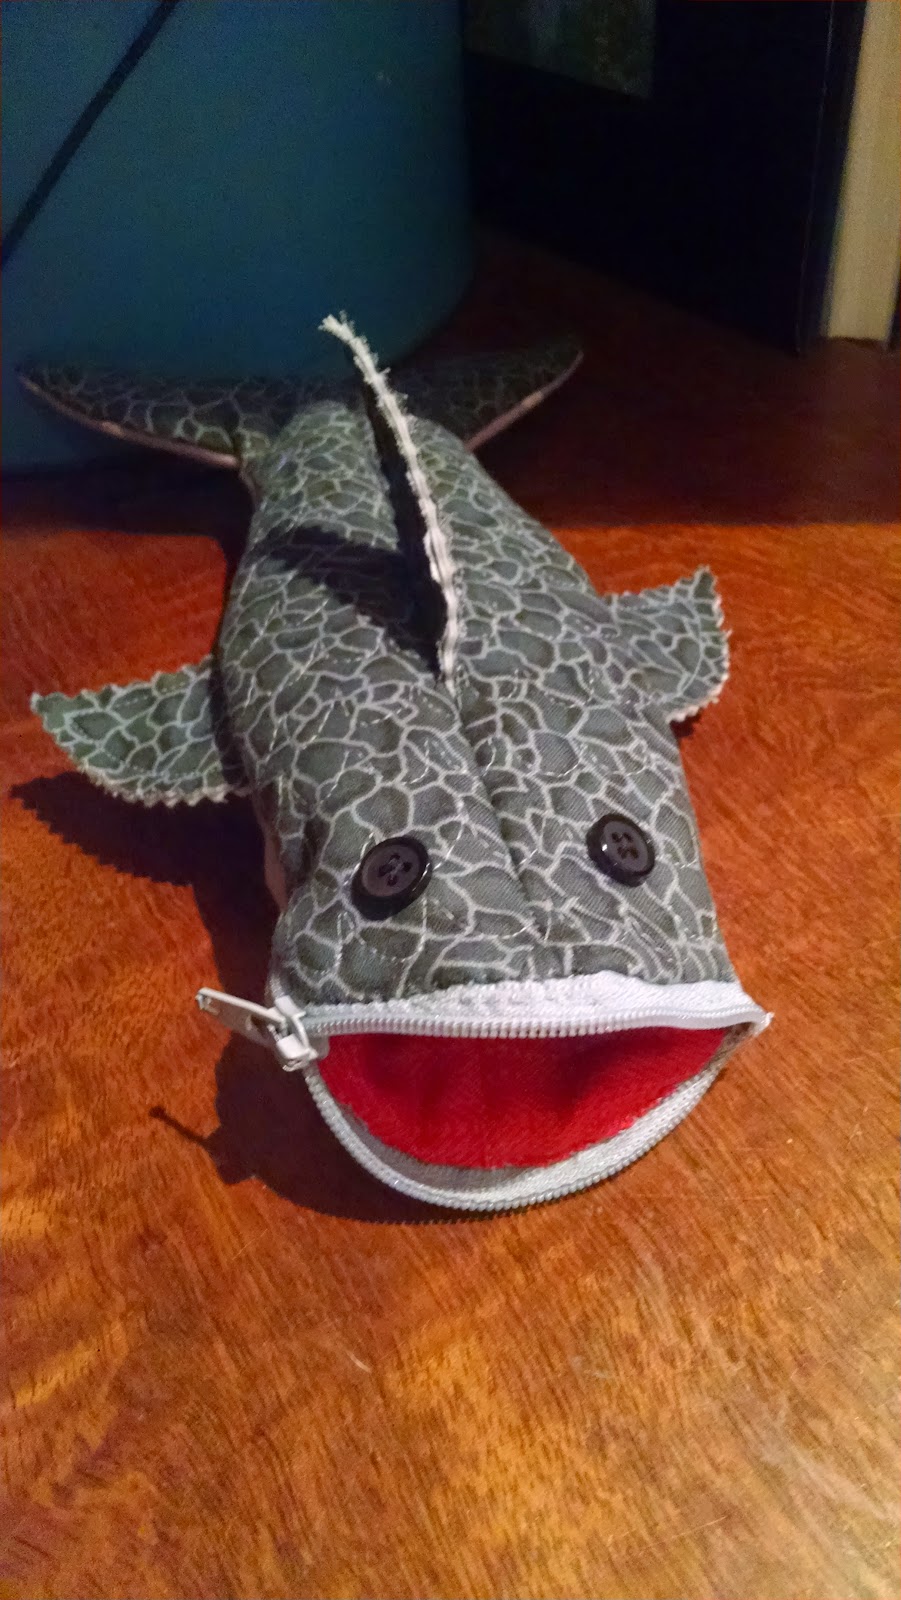
I made a few small gifts also for my grandchildren.  My grandson loves sharks so I put together this little zipper pouch for him.  He loved it so I guess that makes all the cursing over the zipper worthwhile :)  


And for my granddaughter, an apron and some potholders.

And last but certainly not least, the hand knit socks that found their way into Margaret's Christmas stocking.

These are  my feet - checking for size!

I received incredible handmade gifts from Francesca.  I am letting her post about those!

Monday, February 9, 2015

Baby Shower Gifts

As mentioned in an earlier post, baby gifts were in progress for my cousin.   Remember this Baby Bee Quilt?


Well I am delighted to say my beautiful cousin has recently given birth to a healthy little boy!

The Swink Girls attended the baby shower in early December (I know, I know - very late post!) and I made a few little goodies to bring along.    First is this super adorable little baby cap.  The inside is lined with the softest sherpa fleece and the exterior is flannel.    The sweet little cap will surely see some use in this very cold February in the northeast!


I also put together this little pocket diaper changing Kit.  There is a fold out pad that is backed in vinyl for easy clean up and a pouch to hold wipes and diapers.  This could be slipped into a tote or purse for easy changes on the go.


I just love making baby things!  And, I can't wait to see the new little guy in person.  :)